Send Tab
This tab is used for sending CAN messages to configured channels. Messages can be configured manually or added from an associated database files. Message signal values are easily modified using the Configure Signals view.
Send Toolbar
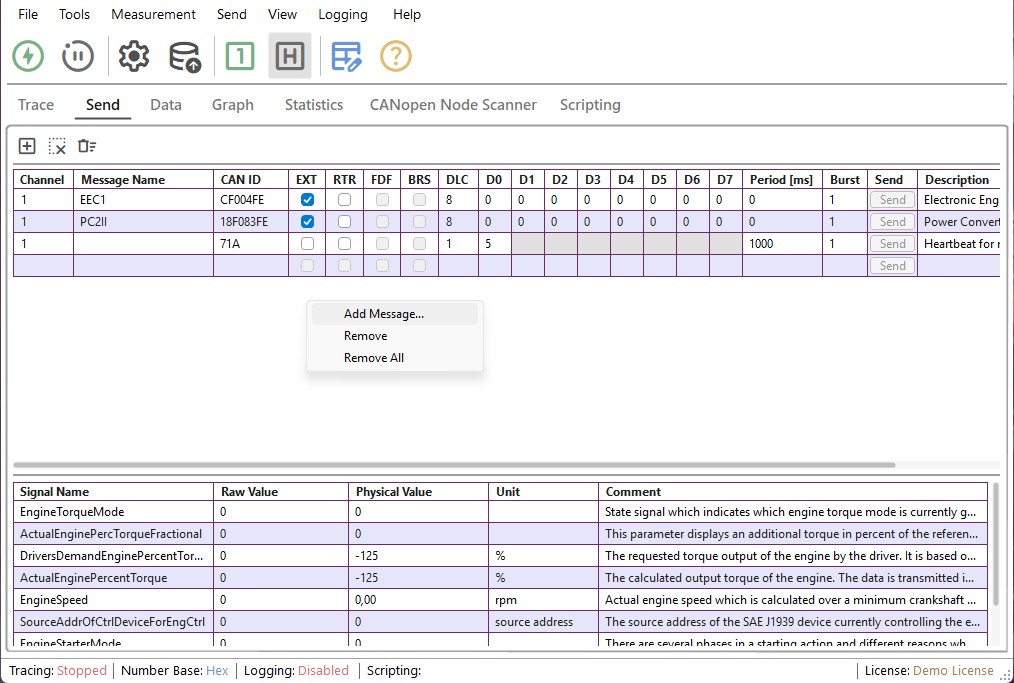
The toolbar provides quick access to the main data window functions. These can be accessed from right-click menu or from top menu.
| Icon | Description |
|---|---|
 |
Adds a new message from the associated databases |
 |
Removes the chosen message |
 |
Removes all messages in the send tab |
Send Message Columns
The Send tab is divided into thirteen sections as described below:
| Column Name | Column Description |
|---|---|
| Ch | The software channel the CAN message is sent on |
| Message name | Name of the message from the associated database |
| Identifier | The CAN Message ID |
| Ext ID | Indicates if the CAN message ID is extended |
| RTR | Indicates if the CAN message is a Remote Transmission Request |
| FDF | Indicates if the message is a CAN FD message |
| BRS | Indicates if Bit Rate Switching is used for this message |
| DLC | Data Length Code of the message |
| Period (ms) | Time between frames in milliseconds. When cycle time is 0 ms, only a single message or burst will be sent. Cycle accepts values between 0 and 5000000 |
| Burst | How many messages that are being sent after each other without any delay. Burst accepts value between 1 and 100 |
| Data (0-7) | Data to be sent. Max length of a message is 8 bytes. The maximum value is 255 in decimal and FF in hexadecimal |
| Send-Button | When Send button is pressed the corresponding row of data is sent as a message with cycle functionality |
| Comment | Description or note about the CAN message |
Sending a Message
CAN messages can be sent using the Send tab, the Log Playback functionality, or the Scripting Tab.
Manually configuring a CAN message
- Click the Ch drop-down list to set the desired software channel for message transmission.
- Set the desired CAN ID for the message in the Identifier cell.
- Set the desired CAN message flags.
- Configure message send cycle in milliseconds.
- Configure message transmission burst amount.
- Fill in the message data in the appropriate cells.
Configuring a CAN message from an associated database
- Right click on the window or add using the toolbar, and select Add message or double click the Message Name cell to open the Add Signal window.
- From the Add Signal window add the desired signals from associated databases by clicking Add & close.
- Configure signal values by selecting a message and configuring individual signal values. These values can be configured using raw of physical values
Note
Ensure that the configured devices in the CANtrace project are plugged in and activated. The send buttons are disabled in the bus off state; when going on bus, the send buttons for messages with a correctly configured channel become active. Messages are sent by clicking the Send button for each message you wish to transmit.
Remove Message
To remove a message, click on the message you want deleted. Then right-click and select Remove to remove that message.
To remove all the messages on the Send tab, right-click and select Remove All.
Multiplexed Signals
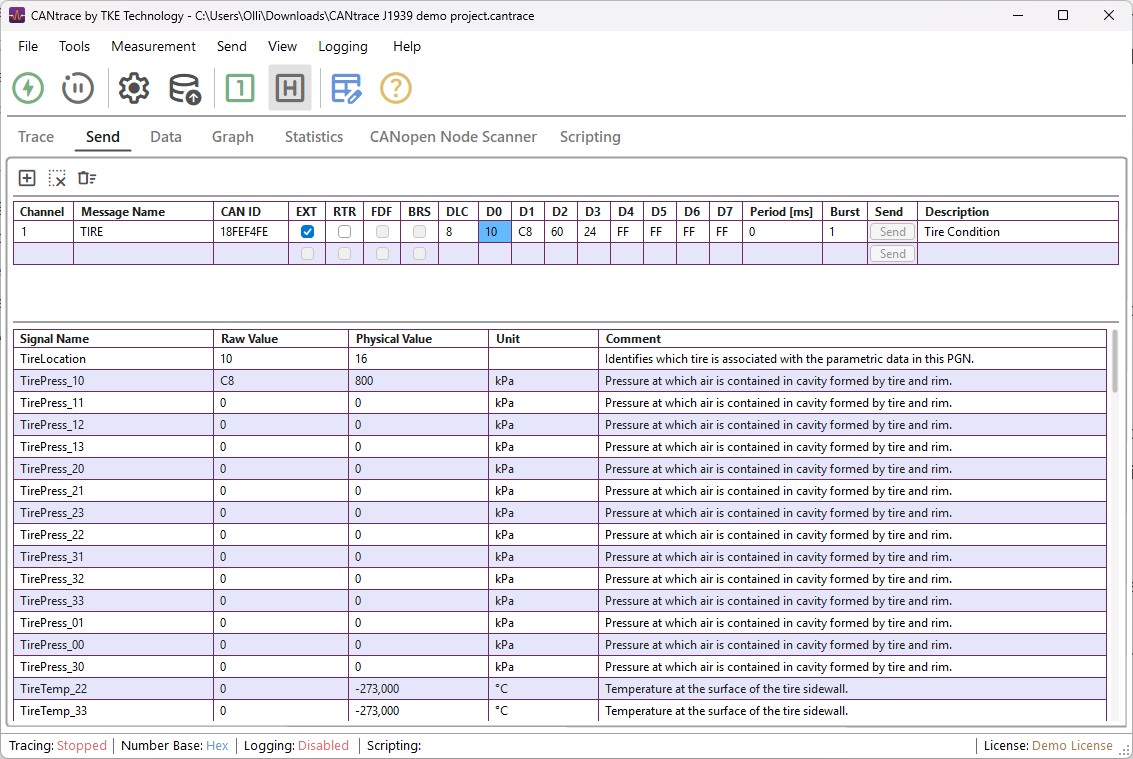
CANtrace supports simple signal multiplexing, where one multiplexor per message is used.
Note
The light blue color (representing Data byte 0) indicates that the corresponding CAN message contains a Multiplexor Signal.
- When you add the Multiplexor Signal from the Database, it will display the corresponding CAN message in the Data byte list.
- The Data byte will update when you change the Raw Value or Physical Value of the multiplexor signal, provided the value matches one of the multiplex values.
- When you change the Data byte in the list, if the value of the multiplexor signal matches one of the multiplex values, the multiplex Raw Value and Physical Value will be updated automatically.