Tab Layout
By default, CANtrace shows its tabs in one tab row in the main window. You can split the main window to show up to four tabs at once, side by side or one above the other, or float tabs into their own windows, for example on a second monitor.
The following terms are used on this page:
- Section: A part of the main window with its own tab row. A section can hold several tabs.
- Active section: The section you clicked last. Float current tab floats its selected tab.
- Floating tab: A tab shown in its own window outside the main window.
- Docked tab: A tab shown in the main window.
Toolbar Buttons
| Icon | Name | Description |
|---|---|---|
 |
Float current tab | Floats the selected tab of the active section. See Floating Tabs. |
 |
Float all tabs | Floats every docked tab. |
 |
Dock all tabs | Docks every floating tab back to the main window. |
 |
Split tabs | Opens a drop-down list to select the layout of the main window. The button icon shows the current layout. See Split View. |
Split View
Layouts
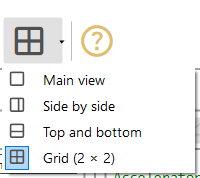
The Split tabs button opens a drop-down list with four layouts. The button shows the icon of the layout in use.
| Icon | Layout | Description |
|---|---|---|
 |
Main view | One section with every tab in one tab row. |
 |
Side by side | Two sections side by side, divided by a vertical divider. |
 |
Top and bottom | Two sections one above the other, divided by a horizontal divider. |
 |
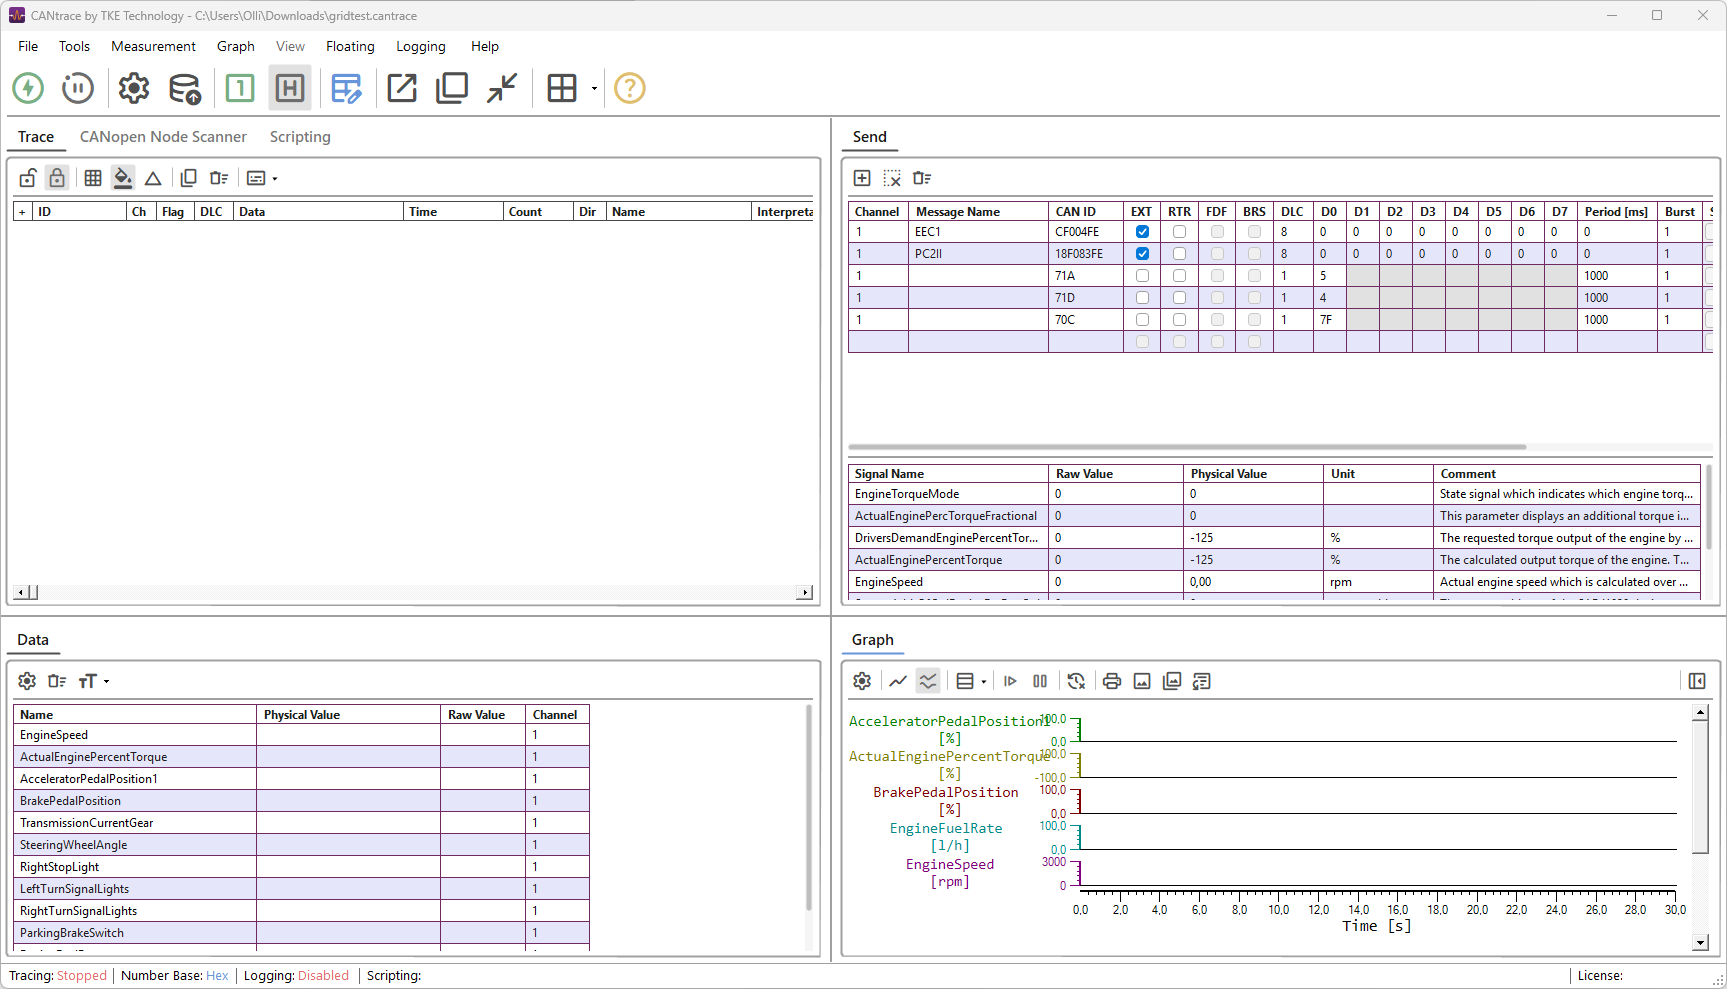
Grid (2 × 2) | Four sections in a 2 × 2 grid. |
When you change to a layout with fewer sections, the tabs of the removed sections move to the remaining sections. No tabs are closed.
Arranging Tabs
- Resize sections: Drag a divider between the sections. In the Grid (2 × 2) layout, drag the point where the dividers cross to resize all four sections at once.
- Move a tab to another section: Drag the tab by its header and drop it on another section, on its tab row or its page area.
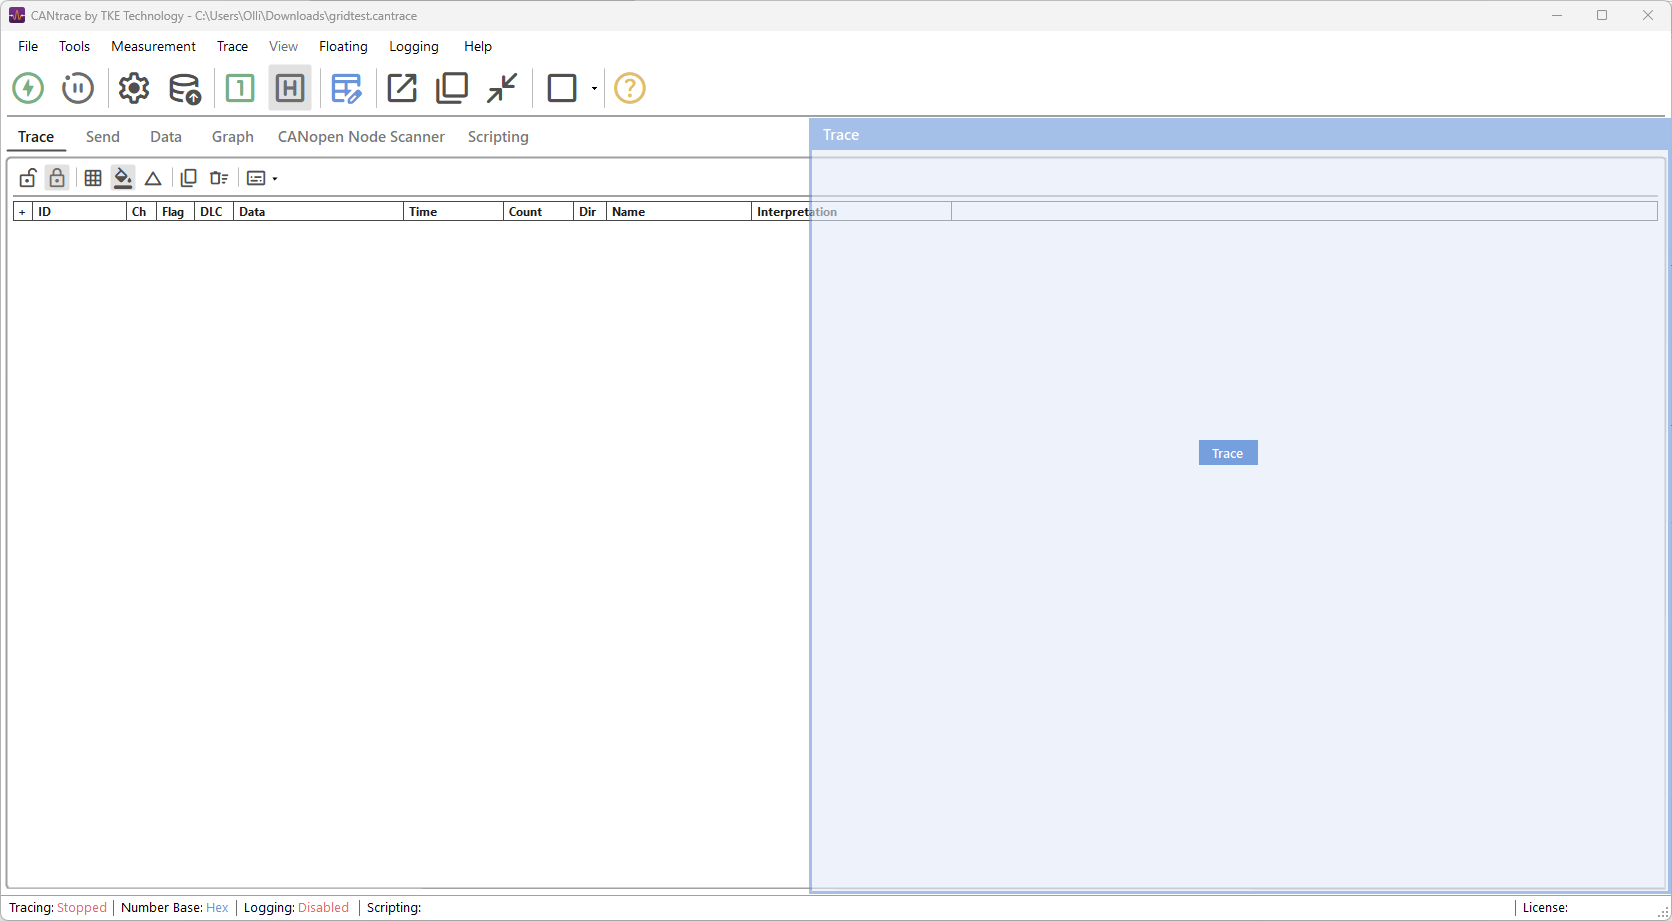
- Split by dragging: Drag a tab off its tab row and drop it inside the main window. While you drag, a label with the tab name follows the cursor, and a preview shows where the tab will be placed. If you release the tab where no preview is shown, it stays where it was.
- From Main view: Drop the tab on the right part of the window to change to Side by side, with the tab on the right. Drop it on the bottom part to change to Top and bottom, with the tab at the bottom. In the bottom right corner area, the tab goes to whichever edge, right or bottom, it is closer to. The top left quarter does not split.
- From Side by side or Top and bottom: Drop the tab on the lower half of a section in Side by side, or on the right half of a section in Top and bottom, to change to Grid (2 × 2).
Floating Tabs
Each floating window has its own button in the Windows taskbar, can be minimized and maximized, and can be selected with Alt + Tab. Floating windows stay open when the main window is minimized.
New floating windows open cascaded on top of the main window, on the monitor where the main window is.
Floating a Tab
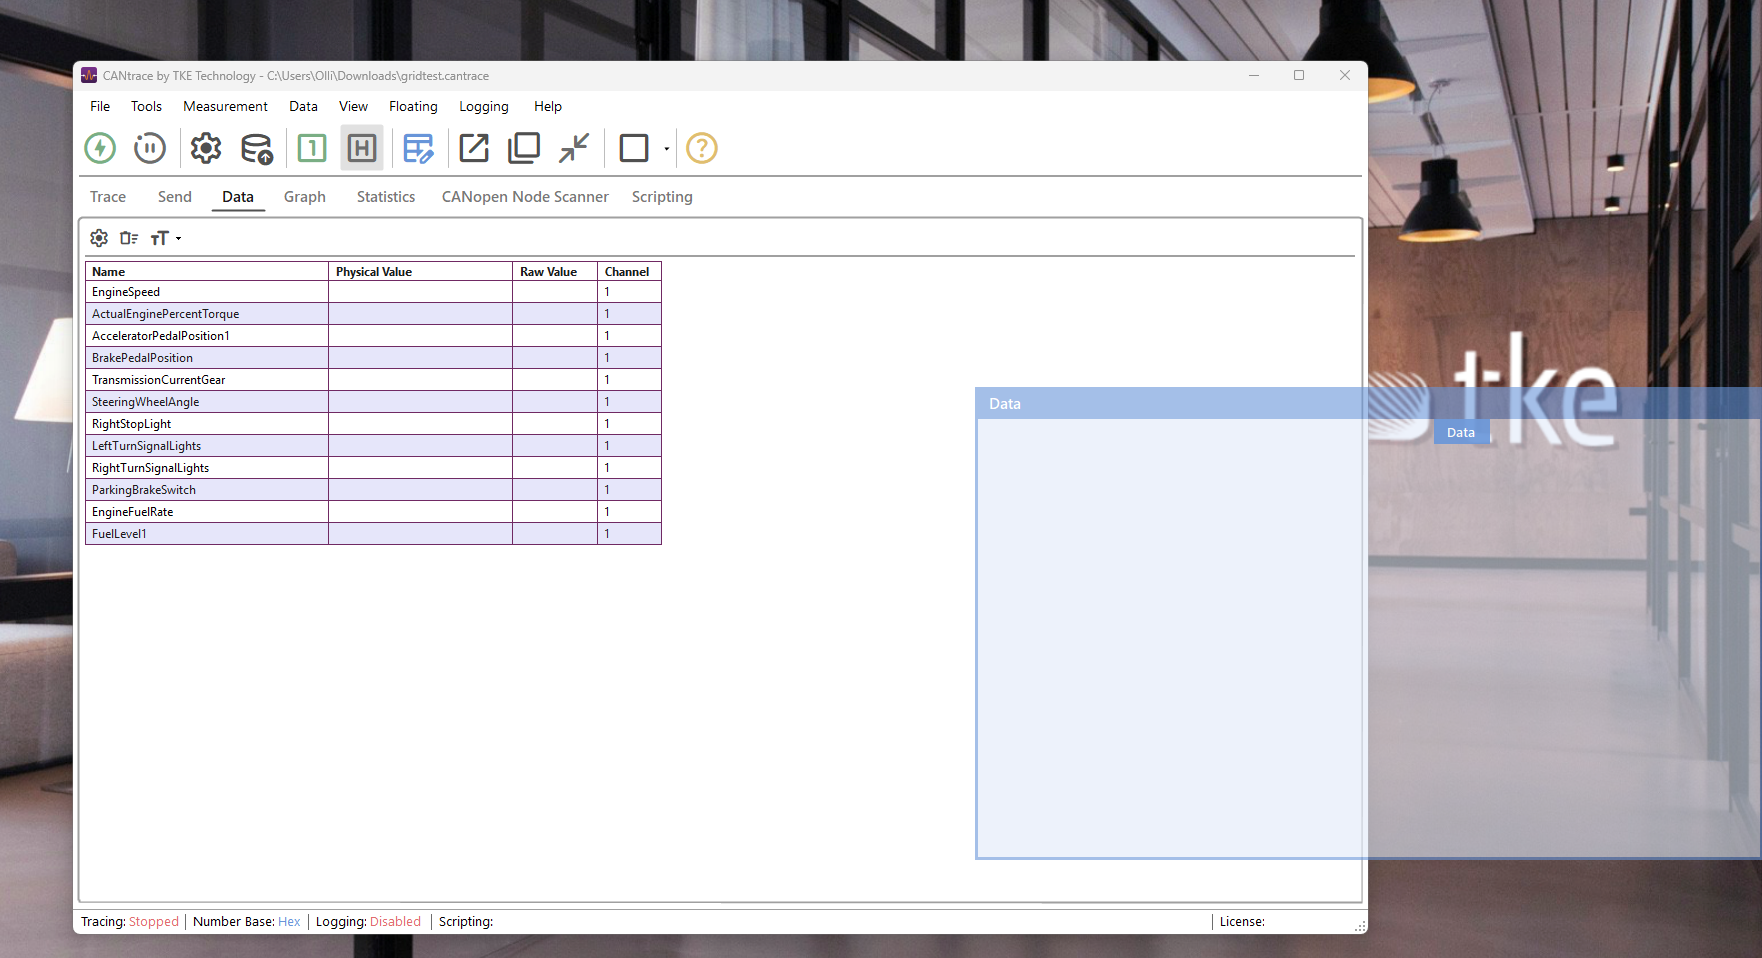
- Drag a tab out: Drag a tab by its header and drop it outside the main window. A preview shows the window, which opens where you release the mouse button.
- Float current tab: Floats the selected tab of the active section. The main window stays in place.
- Float all tabs: Floats every docked tab, cascaded on top of the main window.
Docking a Tab Back
- Close the window: Closing a floating window docks its tab back to the main window, to the section it was in.
- Drag the window back: Drag the floating window by its title bar and drop it on a tab row of the main window, or on an empty section.
- Dock all tabs: Docks every floating tab back to the main window.
Floating Menu
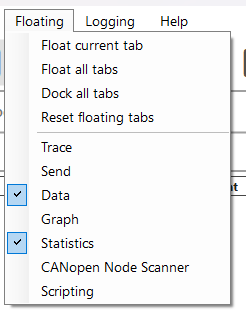
The Floating menu in the menu bar has the same Float current tab, Float all tabs and Dock all tabs commands as the toolbar buttons, and also:
| Command | Description |
|---|---|
| Reset floating tabs | Moves the floating windows back to their default size, cascaded on top of the main window. |
| Tab names | A check mark shows which tabs are floating. Click a tab to float or dock it. |
Tips
- Keep your layout: The layout, the divider positions and the floating window positions are saved in the project file when you save the project. A new project starts with every tab docked in Main view.
- Lost a floating window? If a floating window is off screen, for example after a monitor was disconnected, use Floating > Reset floating tabs to bring every floating window back on top of the main window.
- View menu disabled? The View menu, which shows and hides tabs, is disabled while any tab is floating and while CANtrace is on bus. Dock all tabs and go off bus to show or hide tabs.